Bat-proofing your home is the only permanent solution to bat infestations. Unlike traps or repellents, which are either illegal for bats or ineffective, exclusion and sealing address the root cause by making your home inaccessible. Bat-proofing is a two-phase process: first, let existing bats leave via one-way exclusion devices, then permanently seal every potential entry point. This guide covers the complete bat-proofing workflow.
Key Takeaways
- Never seal bats inside: Bats must leave before you seal. Install one-way exclusion valves first, wait 3 to 7 days, then seal.
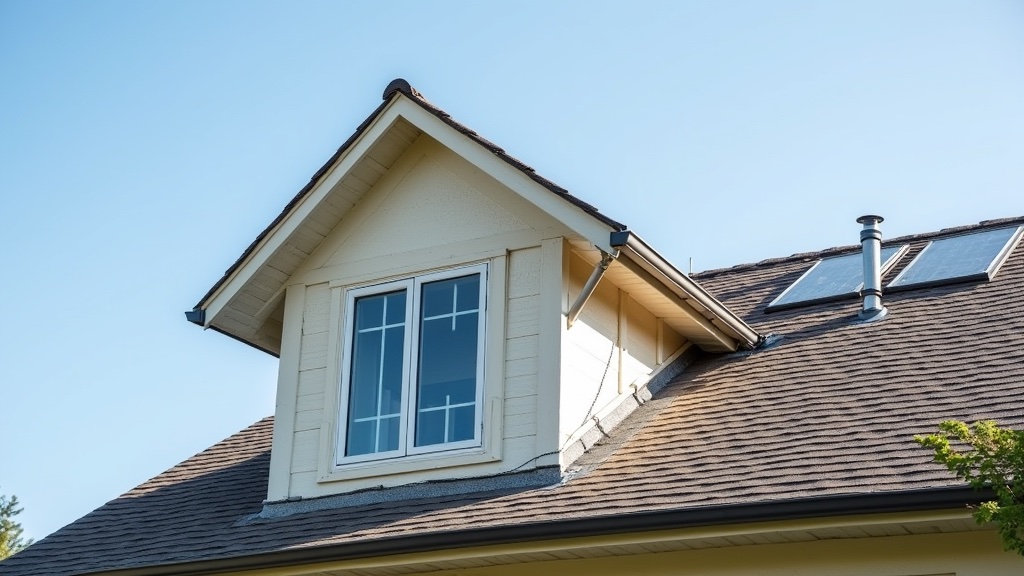
- Focus on the roofline: Most bat entry points are in the top 3 feet of the roofline, including soffits, vents, fascia, and flashing.
- Use the right materials: Hardware cloth (1/4 inch mesh), copper mesh, expanding foam, and caulk are the standard sealing materials.
- Seal in fall or spring: Avoid bat-proofing during maternity season (May through August) when flightless pups may be trapped inside.
- Install a bat house nearby: Providing an alternative roost reduces the chance of bats finding new entry points into your home.
In This Guide
Phase 1: Install One-Way Exclusion Devices
Before you seal any gaps, you must give the bats currently inside your home a way to leave. One-way exclusion valves, also called bat valves, bat cones, or exclusion tubes, allow bats to exit but prevent them from re-entering. These devices are installed over the primary entry points and left in place for 3 to 7 days, longer in cool weather when bats are less active.
Install exclusion valves at the main entry points identified during your bat inspection. The valves should be angled downward so bats can easily crawl out. After 3 to 7 days, remove the valves and seal the opening permanently. See our detailed bat exclusion valve installation guide for step-by-step instructions.
Critical Warning
Never seal bats inside your home. Sealing bats in without providing an exit will cause them to die inside walls, creating odor problems and attracting secondary pests like dermestid beetles. In many states, sealing bats inside is illegal and can result in fines. Always use one-way exclusion first.
Phase 2: Seal Entry Points
Once the colony has been excluded, permanently seal every gap larger than 3/8 inch along your roofline. Use these materials for different types of gaps:
| Entry Point | Sealing Material | Difficulty | Durability |
|---|---|---|---|
| Soffit gaps | Hardware cloth (1/4 inch) plus caulk | Moderate | 15+ years |
| Gable vents | Galvanized hardware cloth (1/4 inch) | Moderate | 15+ years |
| Ridge vent gaps | Polyurethane sealant plus backer rod | Difficult | 10+ years |
| Chimney gaps | Chimney cap with 1/4 inch mesh | Difficult | 20+ years |
| Roof flashing | Silicone caulk plus flashing repair tape | Difficult | 10+ years |
| Fascia gaps | Copper mesh plus exterior caulk | Easy | 10+ years |
| Siding gaps | Copper mesh plus silicone caulk | Easy | 10+ years |
| Utility penetrations | Expanding foam (pest control type) | Easy | 10+ years |
| Wall cracks | Copper mesh plus hydraulic cement | Moderate | 20+ years |
Materials for Bat-Proofing
Using the correct materials is essential for effective, long-lasting bat-proofing. Here are the materials every homeowner needs.
1/4 inch hardware cloth: This is the gold standard for bat exclusion. It is galvanized steel mesh with 1/4 inch openings, small enough to exclude even the smallest North American bat species including the little brown bat (Myotis lucifugus). Use it to cover vents, gaps, and openings larger than a few inches. Unlike bird netting or 1/2 inch mesh, 1/4 inch hardware cloth is bat-proof.
Copper mesh: For smaller gaps and cracks, copper mesh is ideal. It does not rust, is easy to stuff into narrow gaps, and bats cannot chew through it. Copper mesh is the preferred material for sealing around pipes, wires, and small wall gaps. Avoid steel wool, which rusts quickly and crumbles within months.
Expanding foam: Use expanding foam labeled for pest control, such as Great Stuff Pestblock, to seal utility penetrations, small gaps around vents, and irregular openings. Pestblock foam contains a bittering agent that deters chewing.
Caulk and sealant: Use high-quality exterior silicone or polyurethane caulk for sealing gaps around flashing, trim, and siding. Look for a caulk rated for 20+ years that remains flexible with temperature changes.
Pro Tip
Avoid using steel wool for bat-proofing. Steel wool rusts quickly and crumbles, leaving gaps within months. Use copper mesh instead, it lasts indefinitely and does not deteriorate. See our best bat exclusion products guide for product recommendations.
Common Bat Entry Points and How to Seal Them
Soffit Vents
Soffit vents are the most common bat entry point. Bats enter where soffit panels have shifted, warped, or been damaged. Remove the affected soffit panel, install 1/4 inch hardware cloth behind it, and reattach the panel with corrosion-resistant screws. Seal the panel edges with exterior caulk.
Gable Vents
Gable vents are large openings at the ends of attics that are frequently unguarded or covered with loose screening. Cut a piece of 1/4 inch hardware cloth 2 inches larger than the vent opening on all sides. Attach it with corrosion-resistant screws and large washers, then seal the screw heads with exterior caulk.
Chimneys
Uncapped chimneys are direct highways into your home for climbing bat species like the big brown bat (Eptesicus fuscus). Install a stainless steel chimney cap with 1/4 inch mesh screening. Measure your flue size before purchasing, standard sizes range from 8×8 to 13×13 inches. A properly installed chimney cap excludes bats while still allowing smoke to vent.
Ridge Vents
Ridge vents can separate from the roof deck over time, creating a continuous gap along the roof peak. This is a difficult DIY repair. Apply polyurethane sealant along the gap between the ridge vent and roof deck, then install a ridge vent guard, a strip of 1/4 inch mesh specifically designed for ridge vent protection.
When to Bat-Proof: Timing Matters
Bat-proofing timing is critical. In most North American regions, the safe exclusion window is March through April (before maternity season) and August through October (after pups can fly). Bat maternity season runs from approximately May through July in most states. During this period, flightless pups are present in the roost, and sealing them in is both inhumane and illegal.
If you are unsure about the season, consult a licensed wildlife exclusion professional or your state wildlife agency. See our guide on bat maternity season for state-specific timing.
Recommended Bat-Proofing Products
These products are specifically chosen for bat exclusion. Each has been verified for effectiveness by wildlife exclusion professionals.
| Product | Use For | Rating | Buy |
|---|---|---|---|
| Trenk Hardware Cloth 1/4 inch (48×100′) | Covering large vents and gaps | 4.6★ (598) | Amazon |
| PVC Coated Hardware Cloth 1/4 inch (48×50′) | Budget-friendly vent coverage | 4.4★ (65) | Amazon |
| 8 Inch Chimney Cap with Screen | Capping uncapped chimneys | 4.4★ (134) | Amazon |
| Great Stuff Pestblock 12oz | Sealing small gaps and penetrations | 4.3★ (2,380) | Amazon |
| Copper Mesh Rodent Control (2-Roll) | Stuffing narrow cracks and gaps | 4.5★ (566) | Amazon |
| 16×22 Inch Gable Vent with Screen | Replacing damaged gable vents | 4.6★ (441) | Amazon |
| Ridge Vent Critter Guard (65.6′) | Protecting ridge vent gaps | 4.2★ (15) | Amazon |
| Bird B Gone Bat Netting (14×200′) | Large-scale exclusion projects | 4.3★ (122) | Amazon |
Frequently Asked Questions
How long does bat-proofing last?
With quality materials and proper installation, bat-proofing lasts 10 to 20 years. The most vulnerable points are caulk seals around flashing, which may need reapplication every 5 to 10 years.
Can I bat-proof in winter?
Yes, but with limitations. Bats in colder regions may hibernate or migrate. Exclusion valves are less effective in cold weather because bats are less active. Focus on sealing entry points during winter, but verify the roost is empty first.
How much does professional bat-proofing cost?
Professional bat-proofing costs vary by home size, roof complexity, and number of entry points. See our bat removal cost guide for detailed pricing information.
Will bat-proofing also keep out other pests?
Yes. The same sealing methods that exclude bats also block squirrels, raccoons, birds, and mice. Bat-proofing is an excellent investment in overall pest prevention.
Do I need a bat house after bat-proofing?
Installing a bat house nearby is recommended. It gives excluded bats an alternative roost and encourages them to stay in your yard where they provide natural mosquito control. See our best bat houses guide.
Related Resources
See our complete bat in the attic guide for the full exclusion process. For the right tools, check best bat exclusion products. Start with how to inspect for bats if you have not yet identified entry points. Cost planning: bat removal cost guide.
Why Trust Us
WildAnimalsCentral.com is a trusted resource for wildlife control information. Our bat-proofing recommendations are based on National Wildlife Control Operators Association (NWCOA) best practices, state wildlife agency regulations, and input from licensed exclusion professionals. We do not recommend inhumane or illegal methods. This guide was last reviewed and updated in 2026.